Before assembly, thoroughly clean all parts in warm water
with a mildly abrasive cleaner like Ajax, Softscrub or Comet. This will cleanse any additional mold release and allow paints to adhere to the surface. Remove flash or over pour with
a razor knife or saw. Additionally, it is strongly
recommended that you test fit all pieces before final assembly.
On my kit the tab on the hip that slides into torso was slightly out of alignment. This type of issue is easily solved by warming the tab in boiling water and sliding it into the torso hole. Then hold the piece aligned properly and as it cools, it will retain the new alignment. I had a similar issue with the left upper leg tab that goes into the hip.
On the main torso, the caster had to fill the holes for the arms and front lasers. On the master they went all the way through and that just made it more difficult to cast. JPG left divots that you will have to bore out.

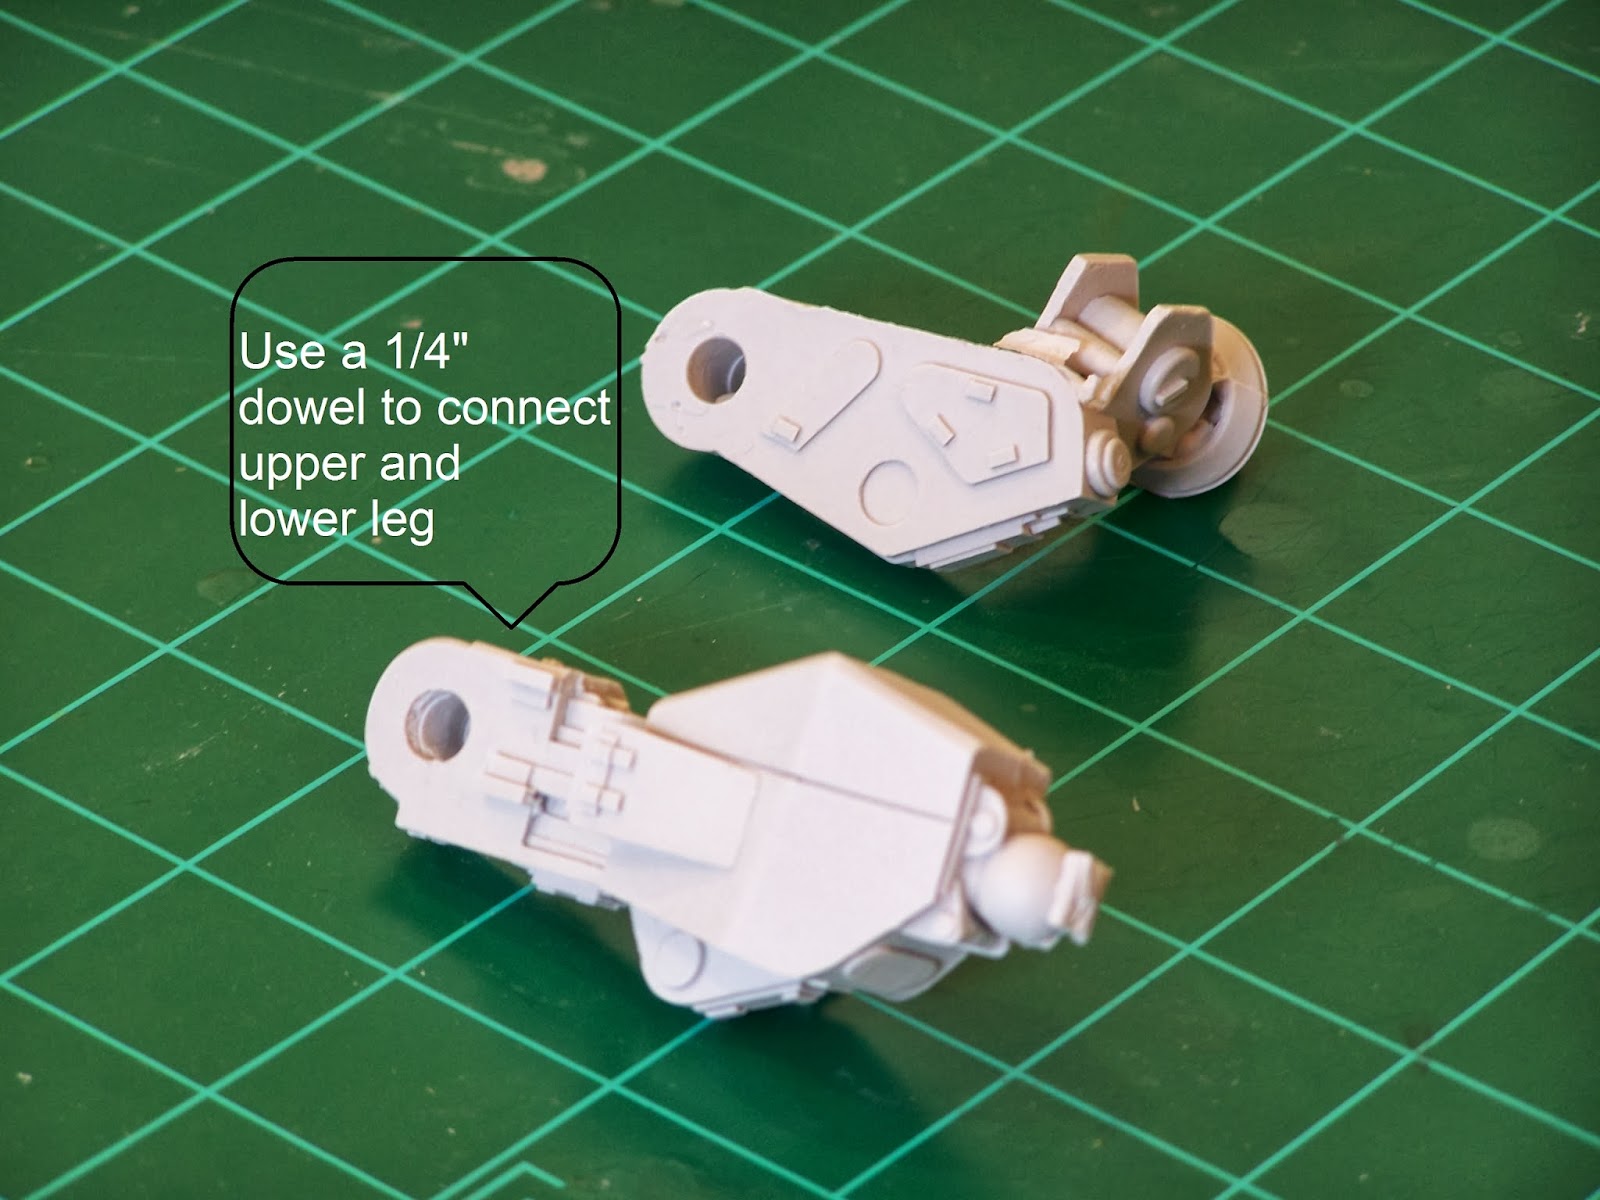
Additionally, on the master there was a rough wood dowel that was used to connect the upper and lower legs. The caster had to remove those to cast the parts. So, you will have to get either wood or plastic .25" dowels to connect them. Sorry for not catching that sooner.
I think that about covers all the big points. Below are a few shots of my quick assembly.


9 comments:
Got mine the other day, looks great! I was scratching my head for a minute over the not-there pegs/dowels for the legs, but that's okay. Gonna have to get creative with the toes, as the flat-splayed look just doesn't do it...though they'd look better even just half-buried in the dirt.
My only worry is that it still feels top-heavy, and I'm not all that confident in the legs! Still, a great model!!
Oh ye of little faith. The one pictured is just slapped together and there are no stability issues. When you put it together, I expect you to talk about its glorious stability. :)
Hah. THAT won't be for a few years yet. I'm a-laying these down for my retirement, so I am!
So, I am seeing lots of builds with no stability issues....just saying. ;P
I am still awaiting for the delivery of mine, taking in the fact that it is coming far still have to wait.
Thinking of different resins & decals to use on it, but I have to be patient until it arrives. :(
Is it best to assemble first prior to painting or reverse?
Is it best to assemble first prior to painting or reverse?
I find it easier to paint sub-structures, then do final assembly.
http://fsjmechbay.blogspot.com.au/
have put a pic of my model here.
Just realised I have the feet backwards... Oh well.
Post a Comment