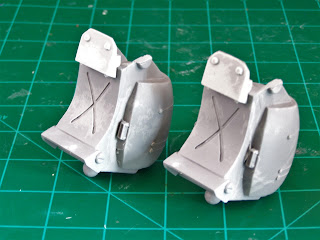
Before assembly, thoroughly clean all parts in warm water
with a mildly abrasive cleaner like Ajax, Softscrub or Comet. This will cleanse
any additional mold release and allow paints to adhere to the surface. Remove flash or over pour with a razor knife
or saw. Additionally, it is strongly
recommended that you test fit all pieces before final assembly.
NOTE: The knee and ankle are ball-and-socket designs. This is only to give the builder more posing options when building. It IS NOT designed to remain unsecured. Once the builder decides on a pose, it is strongly recommended that the joint be secured with CA or some other type of super-glue.
Parts lay-out.
The shoulders go right into the torso. On the prototype, I had to do some sanding and tweaking to get the shoulders to fit flush against the torso. Odd, as the master fit perfectly. I was told that large the volume of resin on large parts creates a lot of heat and can cause some slight warp-age of the part. I don't know that I buy that...
Shoulder and shield parts. Completely optional. They assemble the same on both sides.
Shields attached.
Cockpit.
And cockpit attached...SRM part....
...attached...
Completed Torso.
Large pulse laser and medium pulse laser. The way the medium pulse laser was cast, you have to do some sanding to get it to sit properly under the large pulse laser. Again, a casting issue. Another note: watch out for bubbles under the surface. You will note on the prototype the nasty mold lines. On the production version these should be fixed.
Large and medium pulse laser arm assembled...
The Gauss arm and Laser arms plug right in to the lower part of the shoulder.
The legs. I could not get a good pic, but the back of the knee guard (small piece) need a good bit of sanding to sit flush.
Again, watch out for bubbles...they seem to be lurking just below the surface.
Knee guards attached.
Note, the ball and socket design. These CANNOT support the full weight of the mech. Once you choose a pose, they must be glued or your Templar will topple.
Assembled.
With the old Armorcast Atlas for scale. I really need to repaint that Atlas...I painted it 15 years ago when all I had was rattle cans and an old Testors airbrush that used canned air. Ah, the good ol' days....they sucked, LOL.


No comments:
Post a Comment