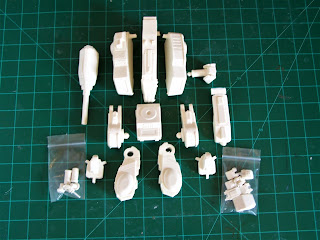
Before assembly, thoroughly clean all parts in warm water
with a mildly abrasive cleaner like Ajax, Softscrub or Comet. This will cleanse
any additional mold release and allow paints to adhere to the surface. Remove flash or over pour with a razor knife
or saw. Additionally, it is strongly
recommended that you test fit all pieces before final assembly.
NOTE: The hip is a
ball-and-socket design. This is only to
give the builder more posing options when building. It IS NOT designed to remain unsecured. Once
the builder decides on a pose, it is strongly recommended that the joint be
secured with CA or some other type of super-glue. Similarly, the knee joint is
a pin design but not meant to be left unsecured by some type of glue.
 |
| Parts Layout |
 |
| Glue sides to main body. These areas should line up as seen. |
 |
| Main Body Assembled. |
 |
| Arm Assembly. 3 Pieces. |
 |
| Parts for legs. |
 |
| Toes attached. I would use a thick epoxy for the front to rather than CA. |
 |
| Note the telescoping pin. The one with the line goes to the outside. |
 |
| Pin from the inside of the leg. This smaller pin will need to be sanded down about 1/8". |
 |
| Assembled leg. Note pins sit flush against leg. I would use an thick epoxy to attache the foot to the lower leg. |
 |
| Legs plug into the hip. Once you have your pose, glue. |
 |
| Torso added. Again, once you have your pose, glue or replace tab with magnets. |
 |
| Final Assembly. |
 |
| My only complaint is the pour stub under the cockpit detail but easily dealt with using a file. |

No comments:
Post a Comment